Dashboard Guide
The varsafe dashboard is a supporting interface for management tasks. Day-to-day secret injection happens through the CLI.
Dashboard vs CLI
Use the dashboard for:
- Creating and managing teams
- Inviting team members
- Managing secrets (bulk import, rotation, diff)
- Environment management
- API token management
- Viewing audit logs
- Security settings (2FA, passkeys)
- Billing and subscriptions
Use the CLI for:
- Injecting secrets into applications
- Exporting secrets
- Day-to-day developer workflow
- CI/CD integration
Navigation
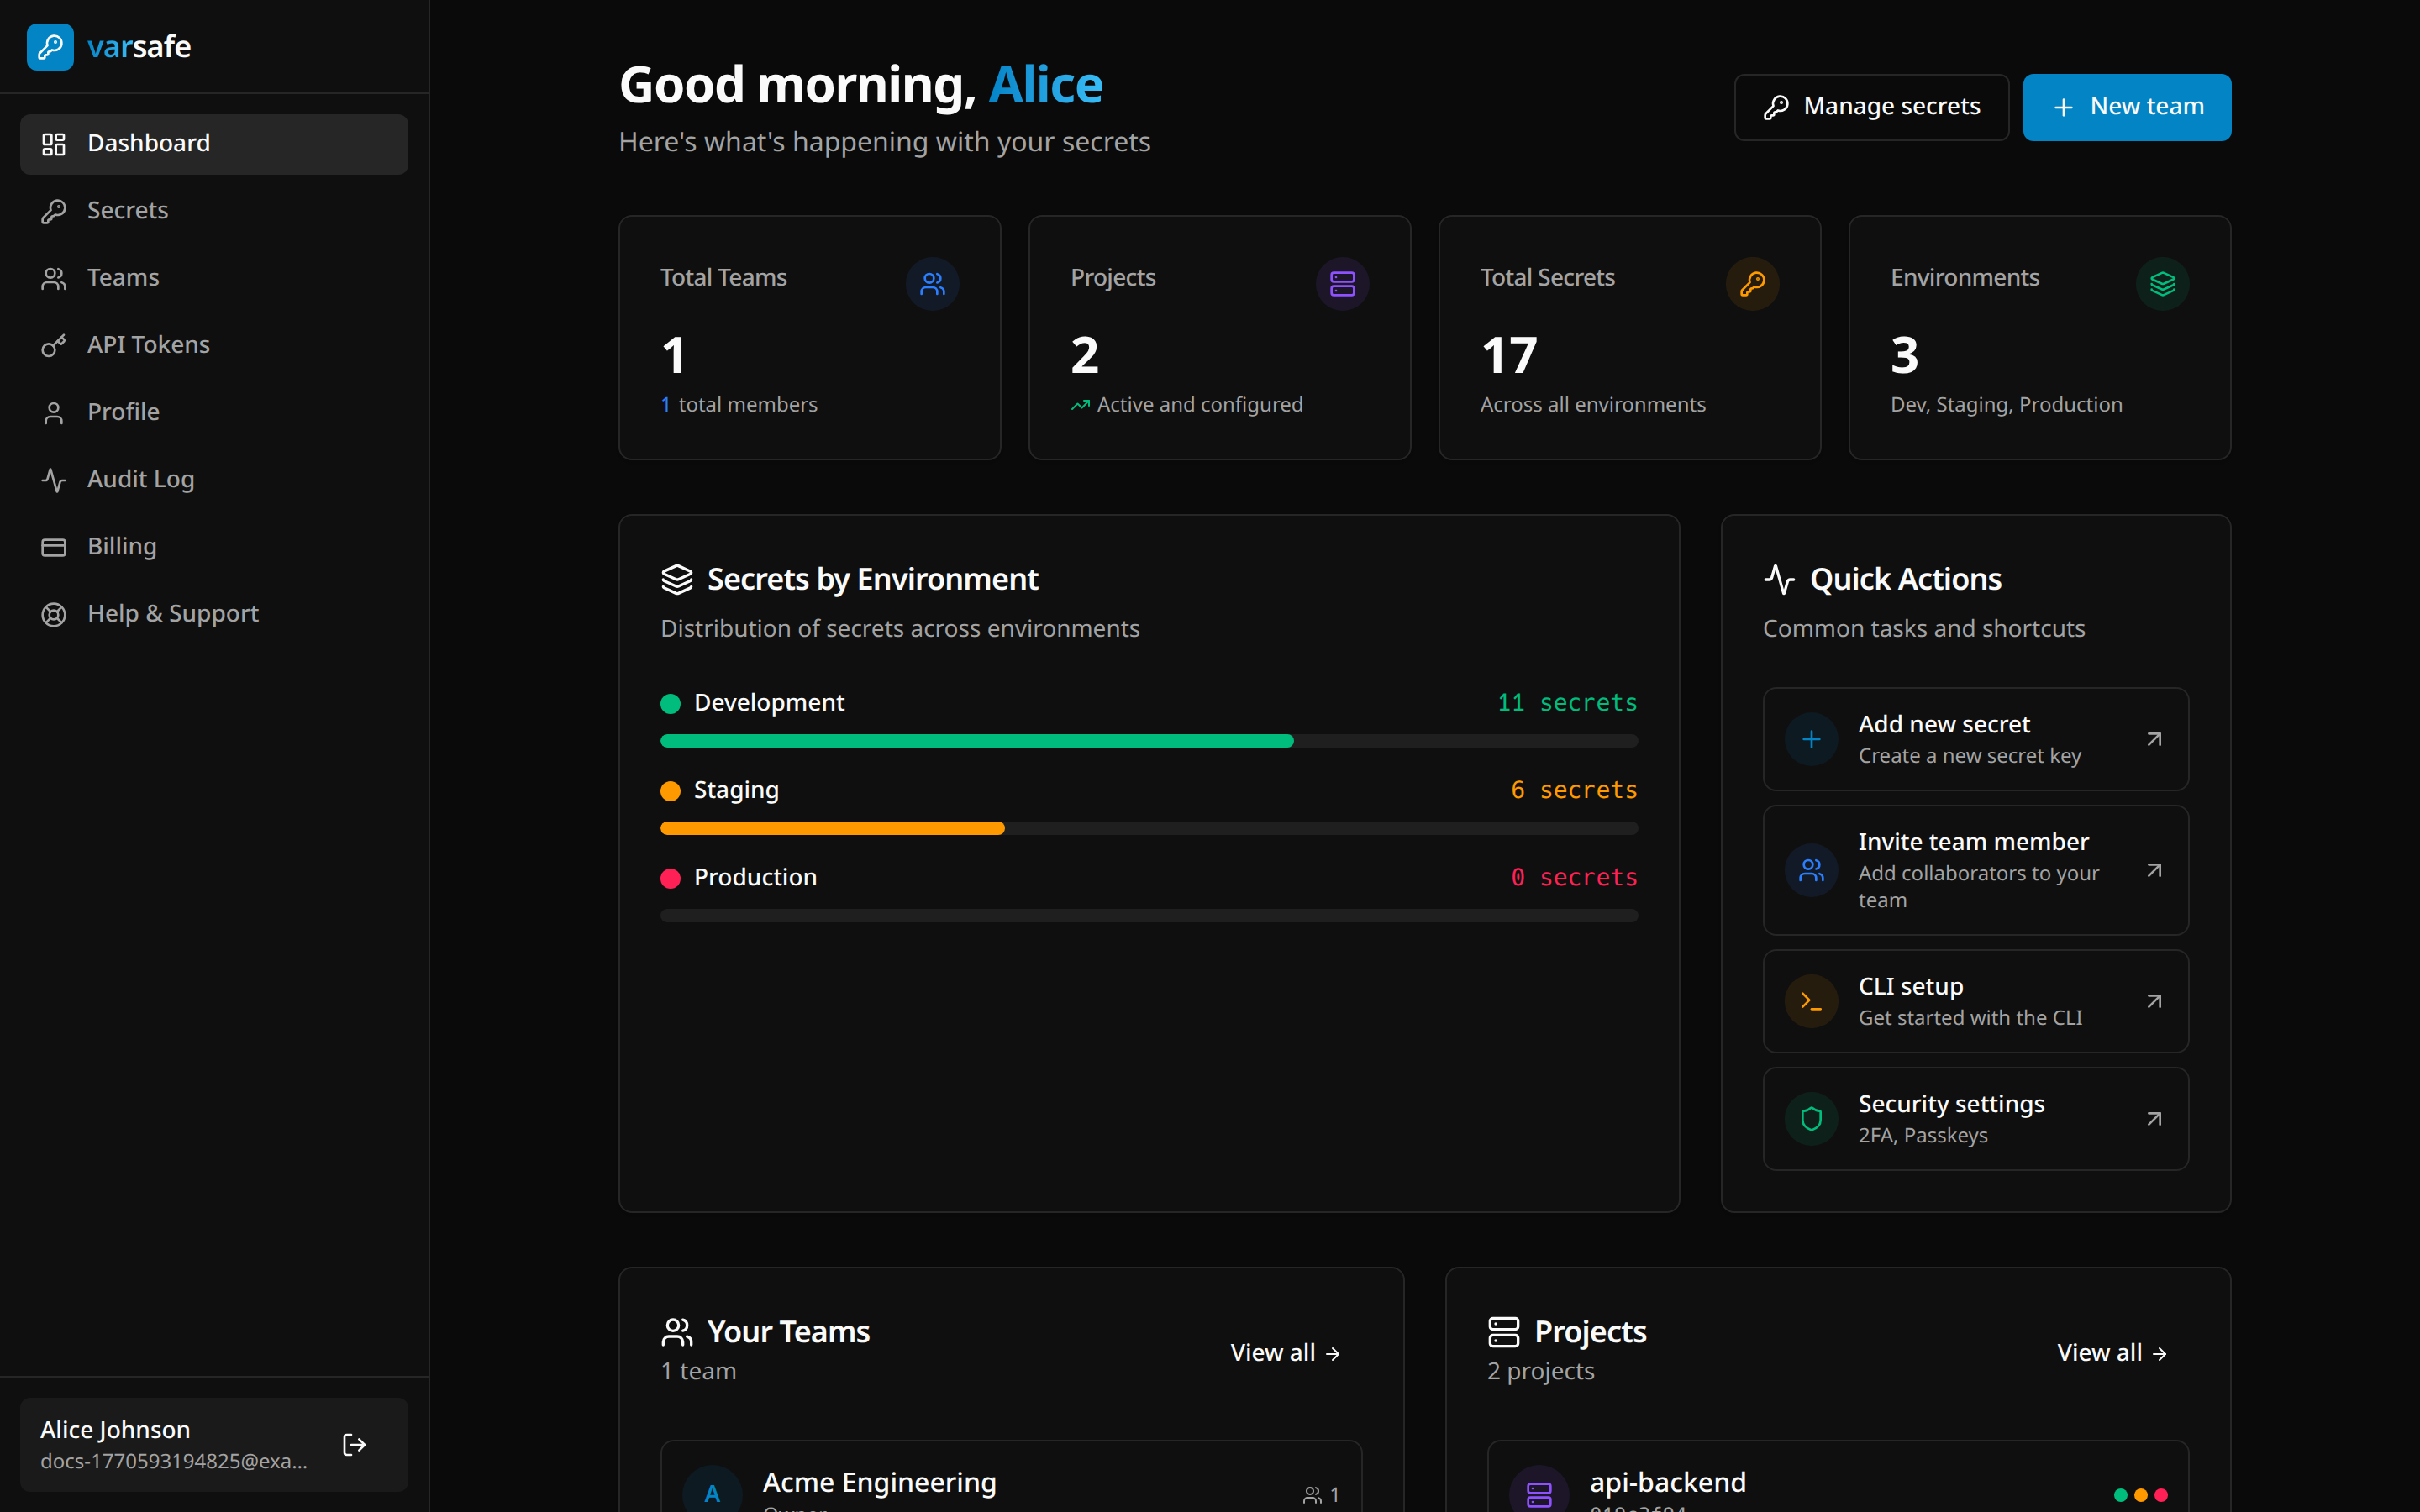
The dashboard has these main sections:
| Section | Purpose |
|---|---|
| Dashboard | Overview of teams, projects, and recent activity |
| Secrets | View and manage secrets by project/environment |
| Teams | Manage teams, members, and projects |
| API Tokens | Create and manage tokens for CI/CD and automation |
| Profile | Account settings, security, and sessions |
| Audit Log | Activity history and compliance exports |
| Billing | Subscription and payment management |
| MCP | Review and revoke AI agent connections |
Secrets Management
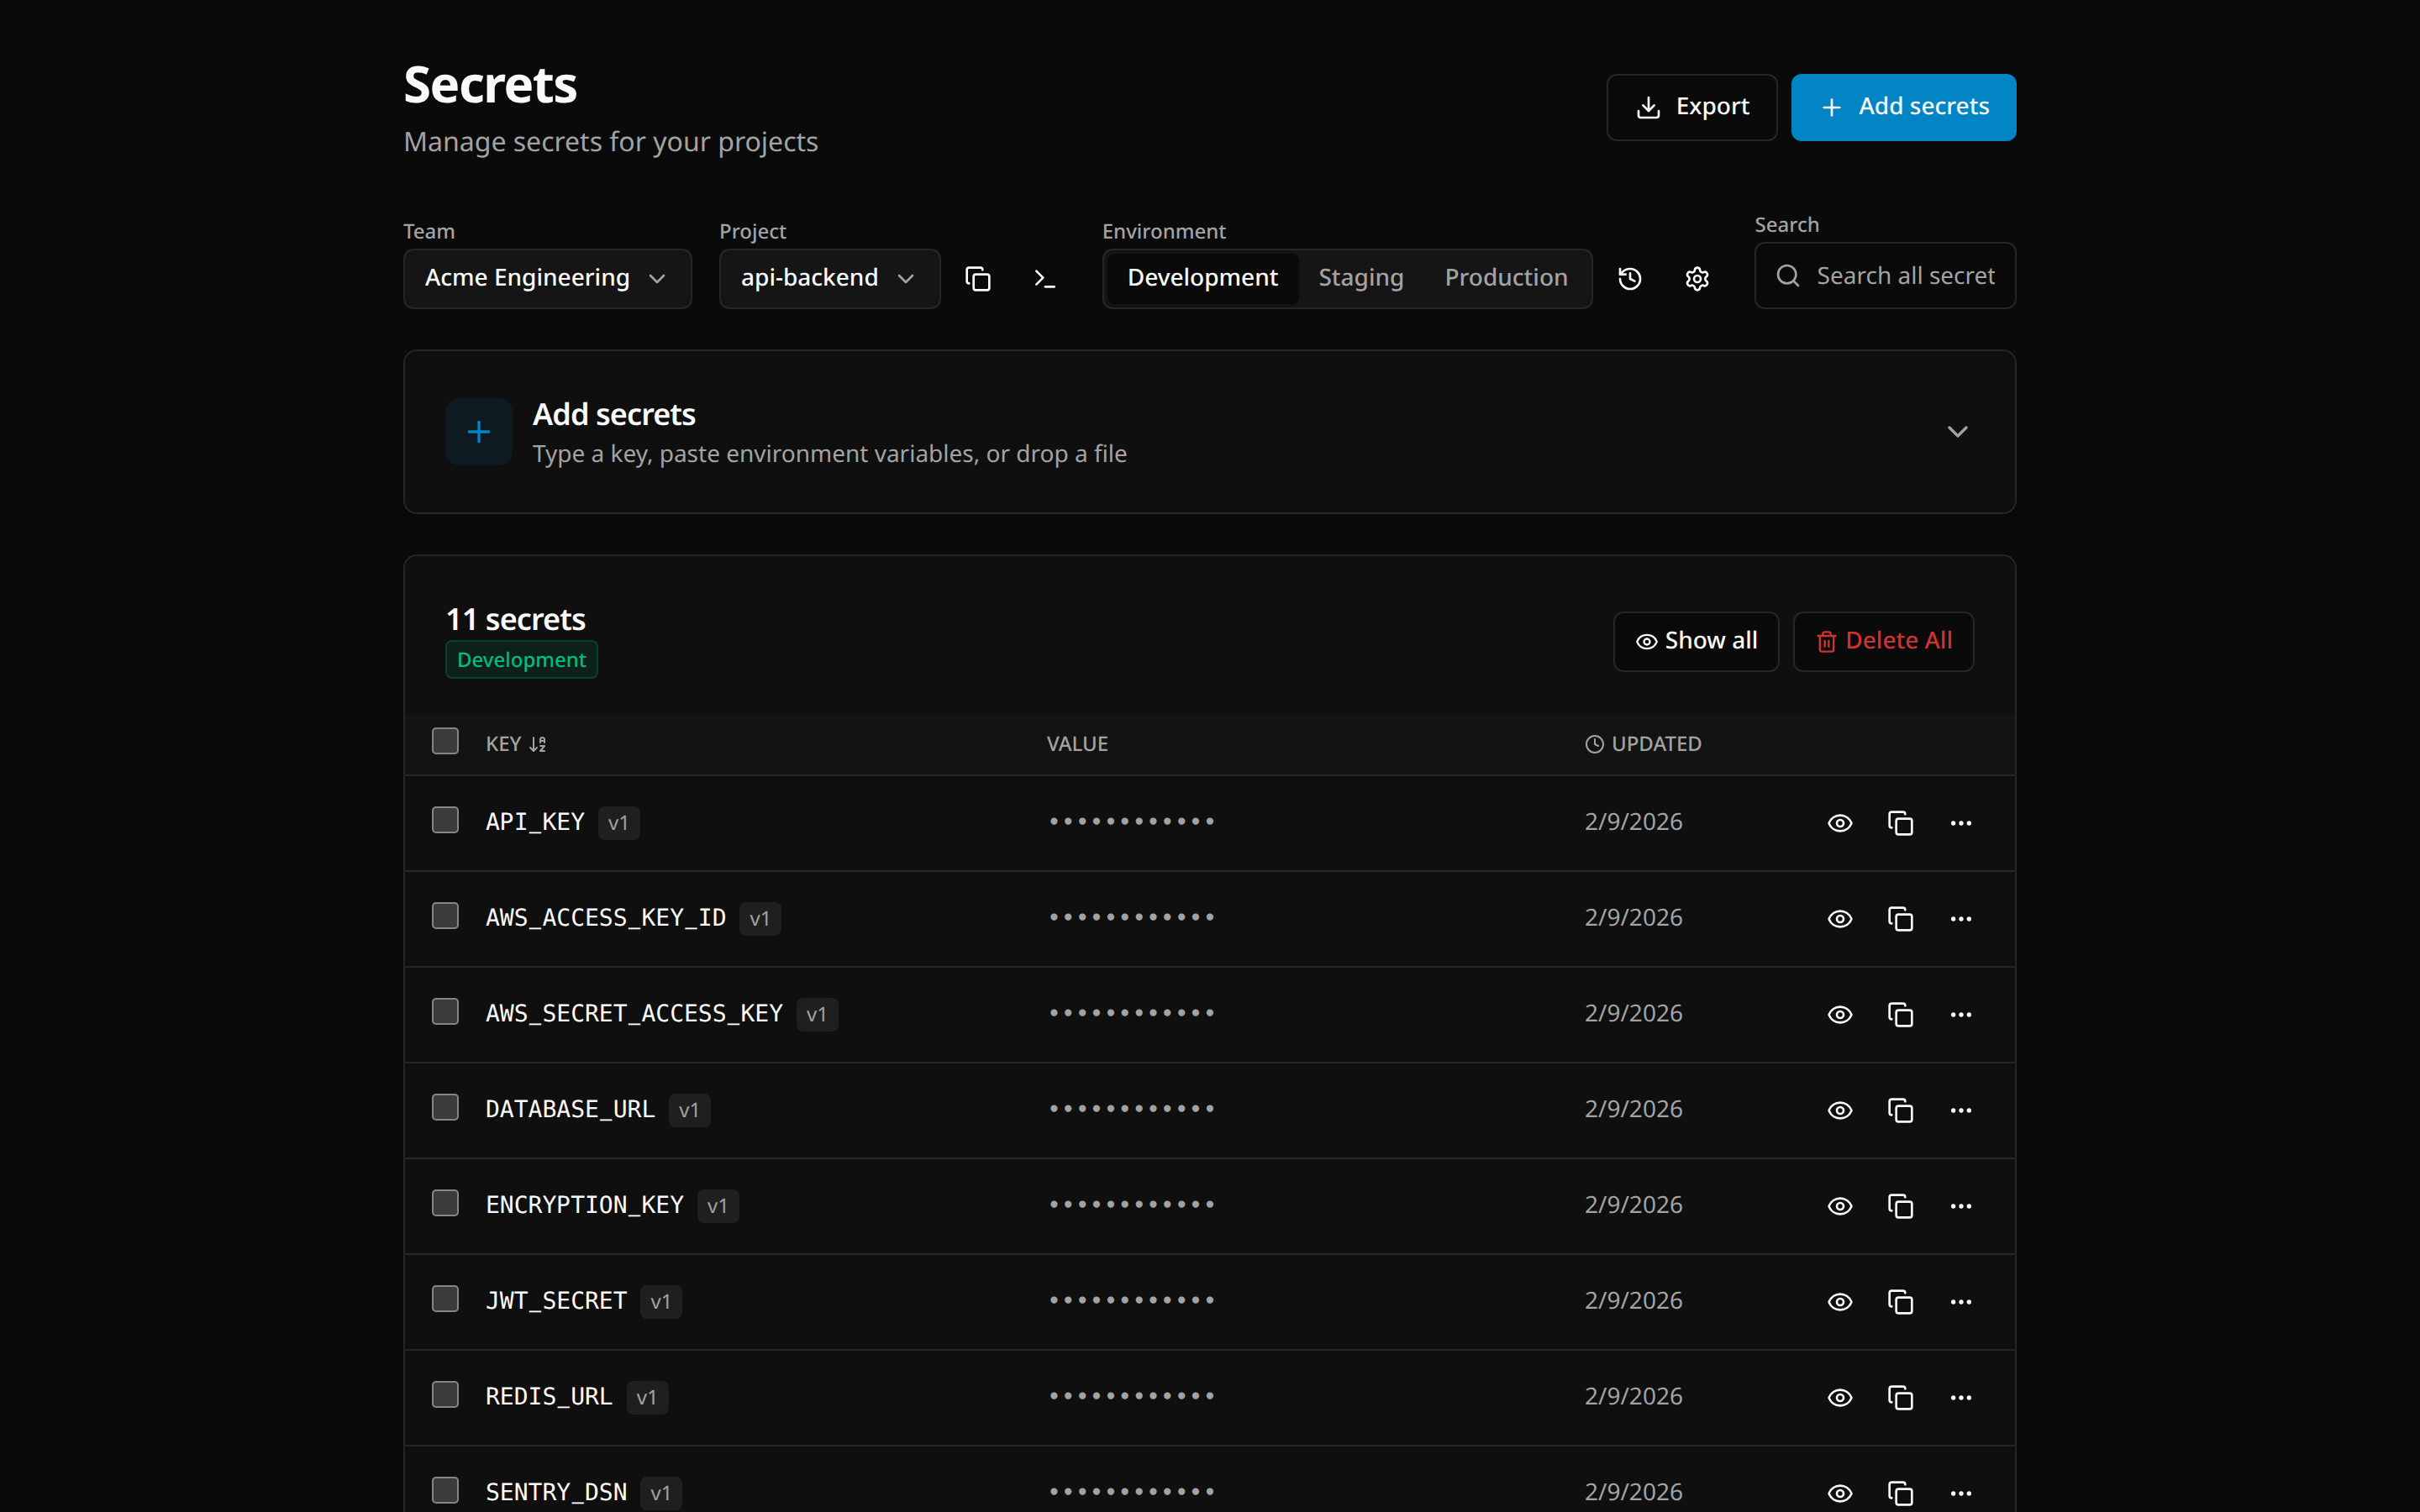
Viewing Secrets
- Navigate to Secrets
- Select a project from the dropdown
- Choose an environment tab (Development/Staging/Production/Custom)
Secrets display:
- Key name
- Version number
- Last updated date
- Masked value (click eye icon to reveal)
Adding Secrets
Single Secret
- Click Add secrets
- Select Single mode
- Enter key (automatically uppercased)
- Enter value
- Click Add
Bulk Import
- Click Add secrets → Bulk
- Either:
- Drag and drop a
.envor.jsonfile - Paste contents directly
- Drag and drop a
- Review parsed secrets
- Click Add X secrets
DATABASE_URL=postgres://localhost/db
API_KEY=sk-1234567890
{
"DATABASE_URL": "postgres://localhost/db",
"API_KEY": "sk-1234567890"
}Editing Secrets
- Click the edit icon next to a secret
- Modify the value
- Click Save
Each edit creates a new version. The previous value is preserved in history.
Deleting Secrets
- Click the delete icon next to a secret
- Confirm deletion
Bulk Delete
- Select multiple secrets using checkboxes
- Click Delete selected
- Confirm deletion
Bulk Edit
Edit multiple secrets at once:
- Click Bulk edit
- Modify keys and values in the editor
- Keys are automatically normalized to uppercase with underscores
- Duplicate keys are flagged and must be resolved before saving
- Click Save to apply all changes in one operation
Bulk edit handles renames and value changes together. If a key is renamed, the old key is removed and the new key is created.
Sync Suggestions
The sync suggestions panel helps you keep secrets consistent across environments. It detects secrets that exist in other environments but are missing from the currently selected one.
- In the Secrets page, look for the Sync suggestions panel
- Suggestions are grouped by source environment with color-coded badges
- For each missing secret you can:
- Click Add to copy it to the current environment
- Click Edit & Add to modify the value before adding
- Click Add all on an environment group to copy all its missing secrets at once
Environment Diff
Compare secrets across environments to find discrepancies:
- In the Secrets page, click Diff
- Select source and target environments
- View differences:
- Only in source — Keys missing in target
- Only in target — Keys missing in source
- Different values — Keys with different values
Secret History & Rollback
Every edit creates a new version, and rollback works at two levels: a single secret, or the whole environment.
Single Secret
- Open a secret’s row actions and click History to see its version history
- Each entry shows the version, who changed it, and when
- Click Restore on a previous version and confirm — the value is restored as a new version
Whole Environment
- In the Secrets page, click History to see all operations for the current environment (creates, updates, deletes — with actor and timestamp)
- Click Rollback next to an operation
- Preview what will change:
- Secrets to be deleted
- Secrets to be restored
- Secrets to be reverted to previous versions
- Confirm the rollback
Secret Rotation
Rotate secrets with preview mode to ensure safe propagation:
- Open a secret’s row actions and click Rotate
- Either:
- Let varsafe auto-generate a new value
- Enter a new value manually
- Preview the change
- Confirm rotation
The old value becomes immediately invalid. The next varsafe run or varsafe export receives the new value.
Environment Management
Default Environments
Every project comes with three environments:
- Development — Local development
- Staging — Pre-production testing
- Production — Live systems (protected by default)
Creating Custom Environments
- Go to your project settings
- Click Add environment
- Enter name and slug
- Choose a color for visual identification
- Set protection status
- Click Create
Protected Environments
When an environment is marked as protected:
- Owner / Admin — read/write access
- Developer / Operator — read-only access
- Viewer / Billing — no access
To protect an environment:
- Go to environment settings
- Toggle Protected on
- Save changes
Duplicating an Environment
Duplicate an existing environment to create a copy with all its secrets:
- Go to your project’s environment list
- Click the Duplicate button next to an environment
- In the modal, enter:
- Name — The new environment name
- Slug — URL-safe identifier
- Color — Visual identifier for the environment
- Protected — Whether the new environment should be protected
- Click Duplicate
All secrets from the source environment are copied to the new one. Changes to the new environment do not affect the original.
Deleting Environments
- Go to environment settings
- Click Delete environment
- Confirm deletion (this is permanent)
Team Management
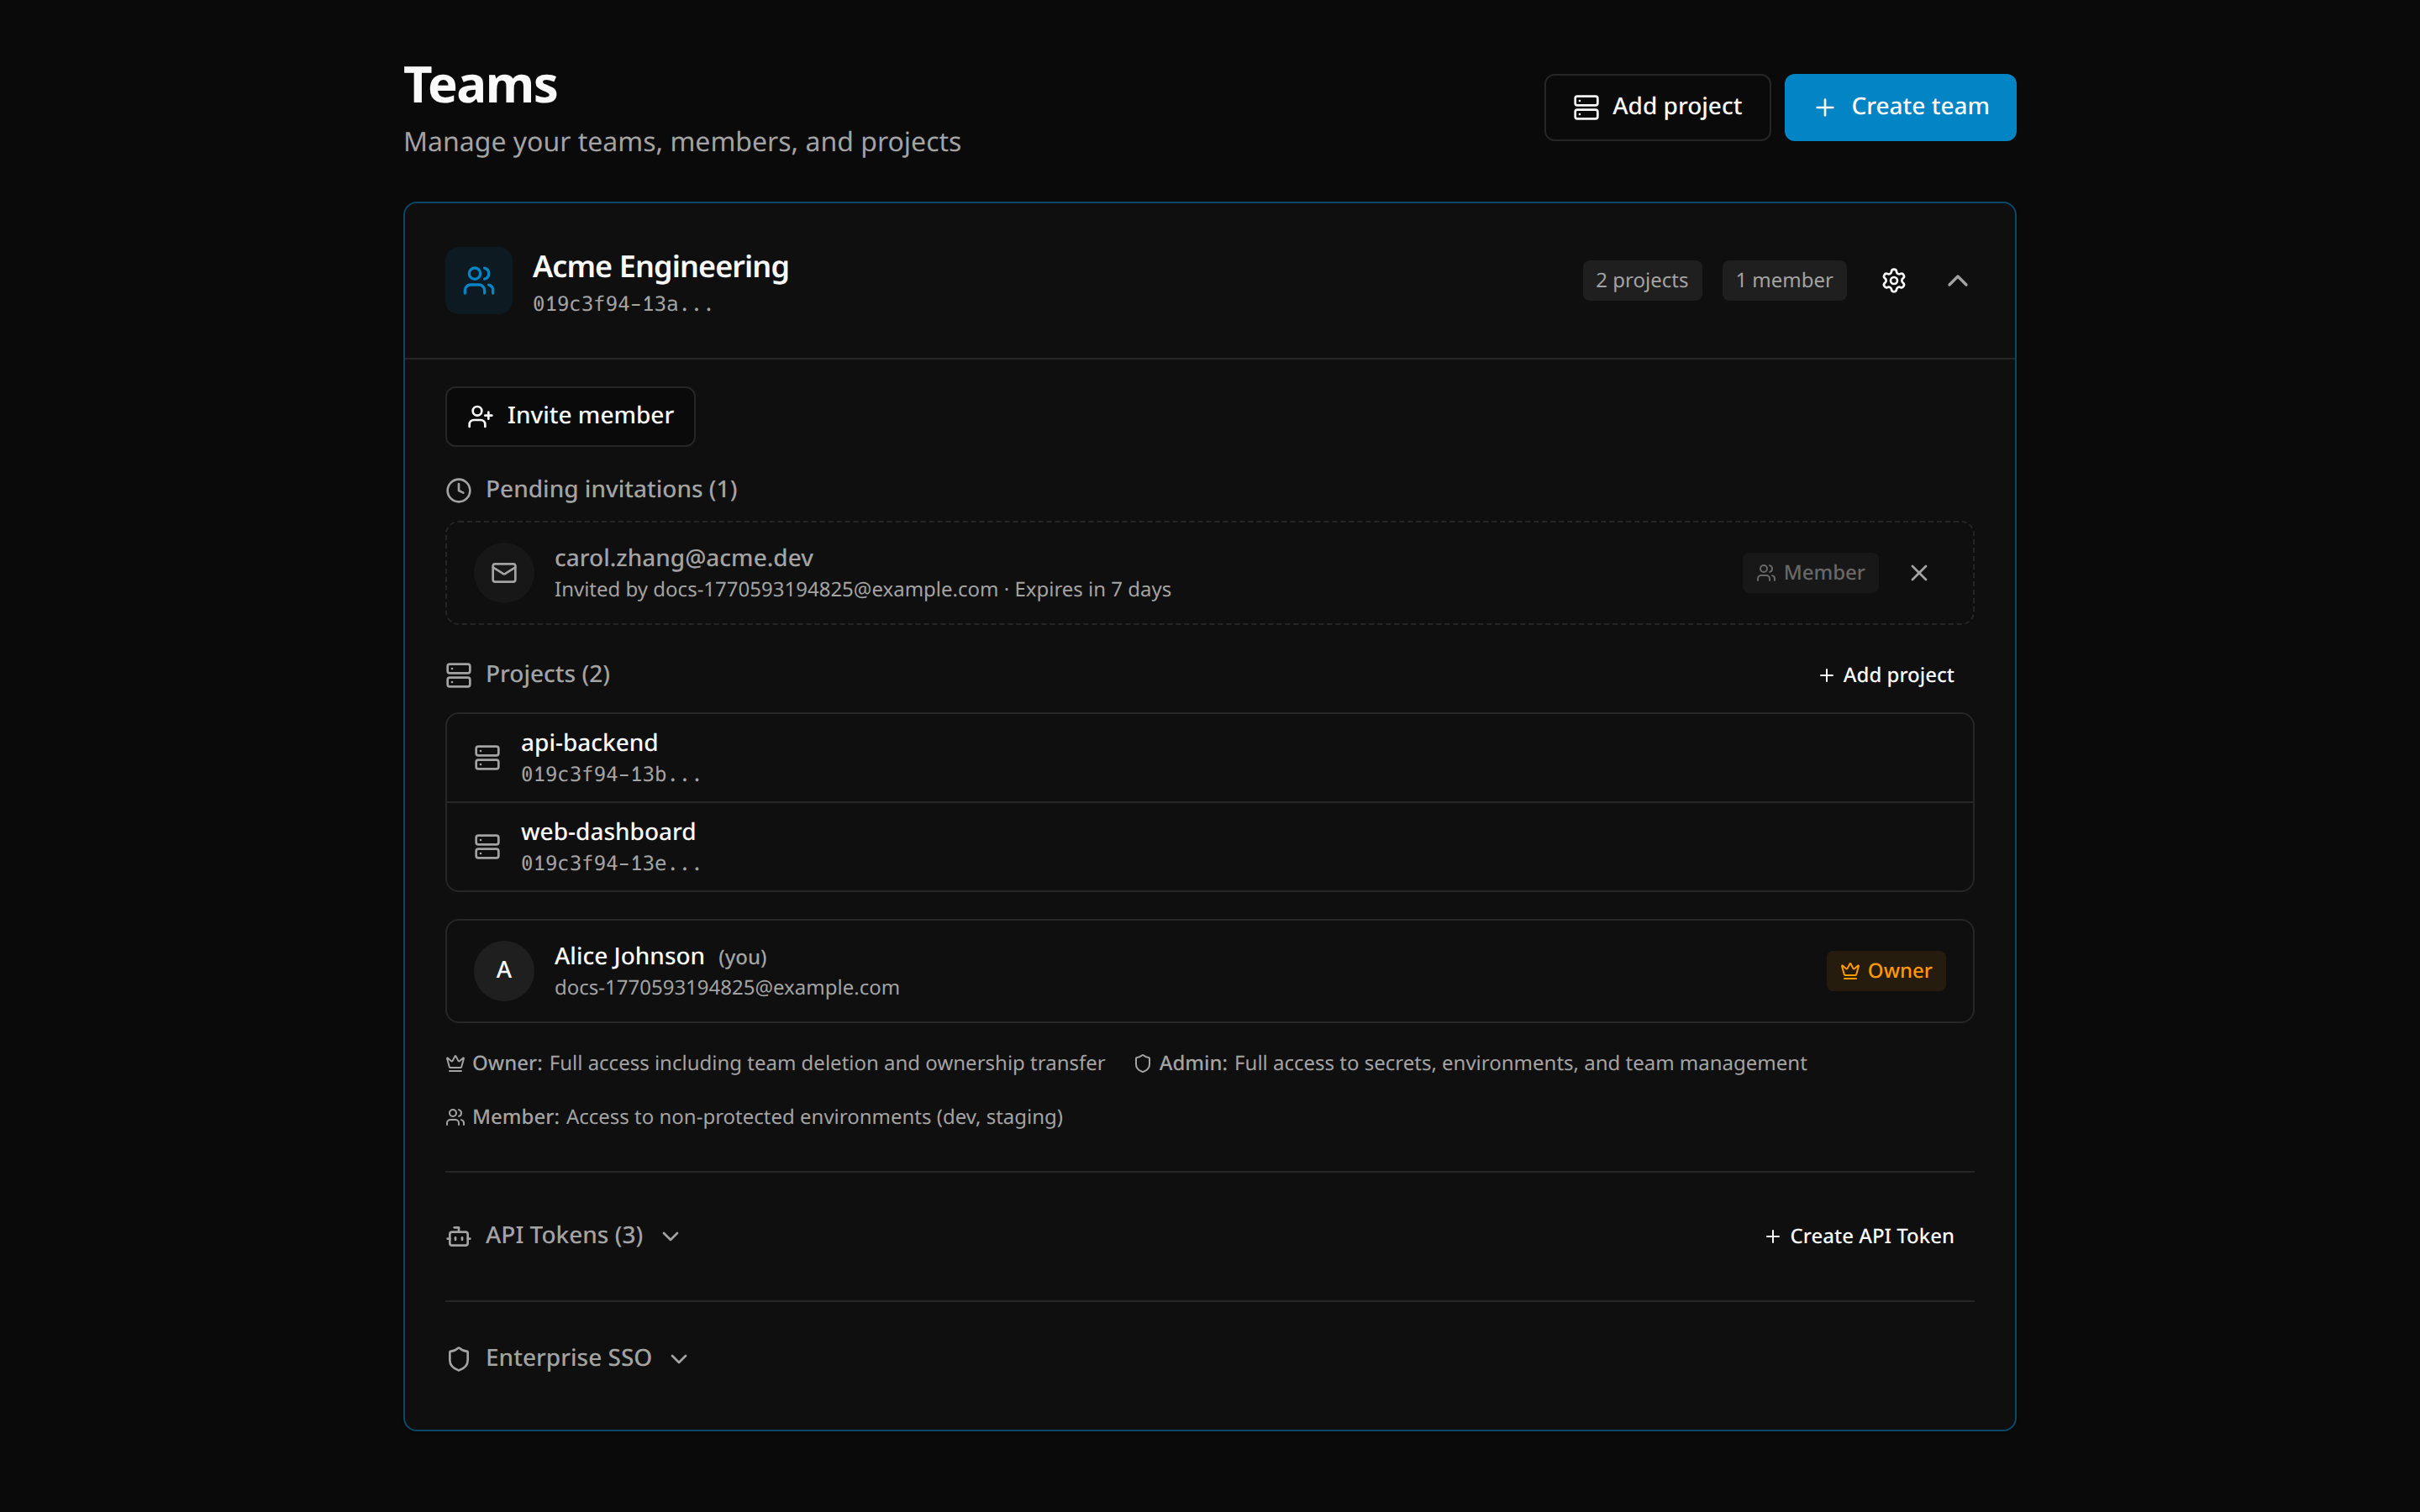
Creating a Team
- Navigate to Teams
- Click Create team
- Enter team name
- Click Create
Creating a Project
- Navigate to Teams
- Click Add project
- Select the owning team
- Enter project name (match your repository name)
- Click Create
Inviting Members
- Expand a team by clicking it
- Click Invite member
- Enter their email address
- Select a role:
- Admin — Manage members and all secrets in all environments
- Developer — Read/write secrets in non-protected environments, read-only in protected
- Operator — Read-only access to all environments including protected
- Viewer — Read-only access to non-protected environments
- Billing — Billing management only, no secret access
- Click Send invite
Changing Roles
- Expand a team
- Click the … menu next to a member
- Select Change role
- Choose the new role
Deactivating Members
Deactivation soft-disables a member instead of removing them, preserving their audit history and making reactivation easy.
- Expand a team
- Click the … menu next to a member
- Select Deactivate
Deactivated members:
- Retain their role and audit history
- Have a 7-day grace period where access is preserved
- Cannot access secrets after the grace period
- Do not count toward active member limits after grace period
To reactivate a member, click the … menu and select Reactivate. The member regains full access immediately.
Removing Members
- Expand a team
- Click the … menu next to a member
- Select Remove from team
- Confirm removal
Transferring Ownership
- Expand a team
- Click the … menu next to a member
- Select Transfer ownership
- Confirm transfer
API Tokens
API tokens enable programmatic access for CI/CD pipelines and automation.
Creating a Token
- Go to API Tokens in the sidebar
- Select the team the token should belong to — tokens are scoped to a single team
- Click Create token
- Enter a descriptive name (e.g. the pipeline that will use it)
- Click Create
- Copy the token immediately — It won’t be shown again
Using Tokens
Set the VARSAFE_API_TOKEN environment variable (or VARSAFE_TOKEN as an alias):
export VARSAFE_API_TOKEN=vs_at_xxxxxxxxxxxxx
varsafe run -p my-api -e production -- ./deploy.sh
Or in CI/CD:
env:
  VARSAFE_API_TOKEN: ${{ secrets.VARSAFE_API_TOKEN }}
Rotating Tokens
- Click Rotate next to a token
- A new token is generated
- Copy the new token
- Update your CI/CD secrets
The old token is immediately invalidated.
Revoking Tokens
- Click Revoke next to a token
- Confirm revocation
The token stops working immediately.
Security Settings
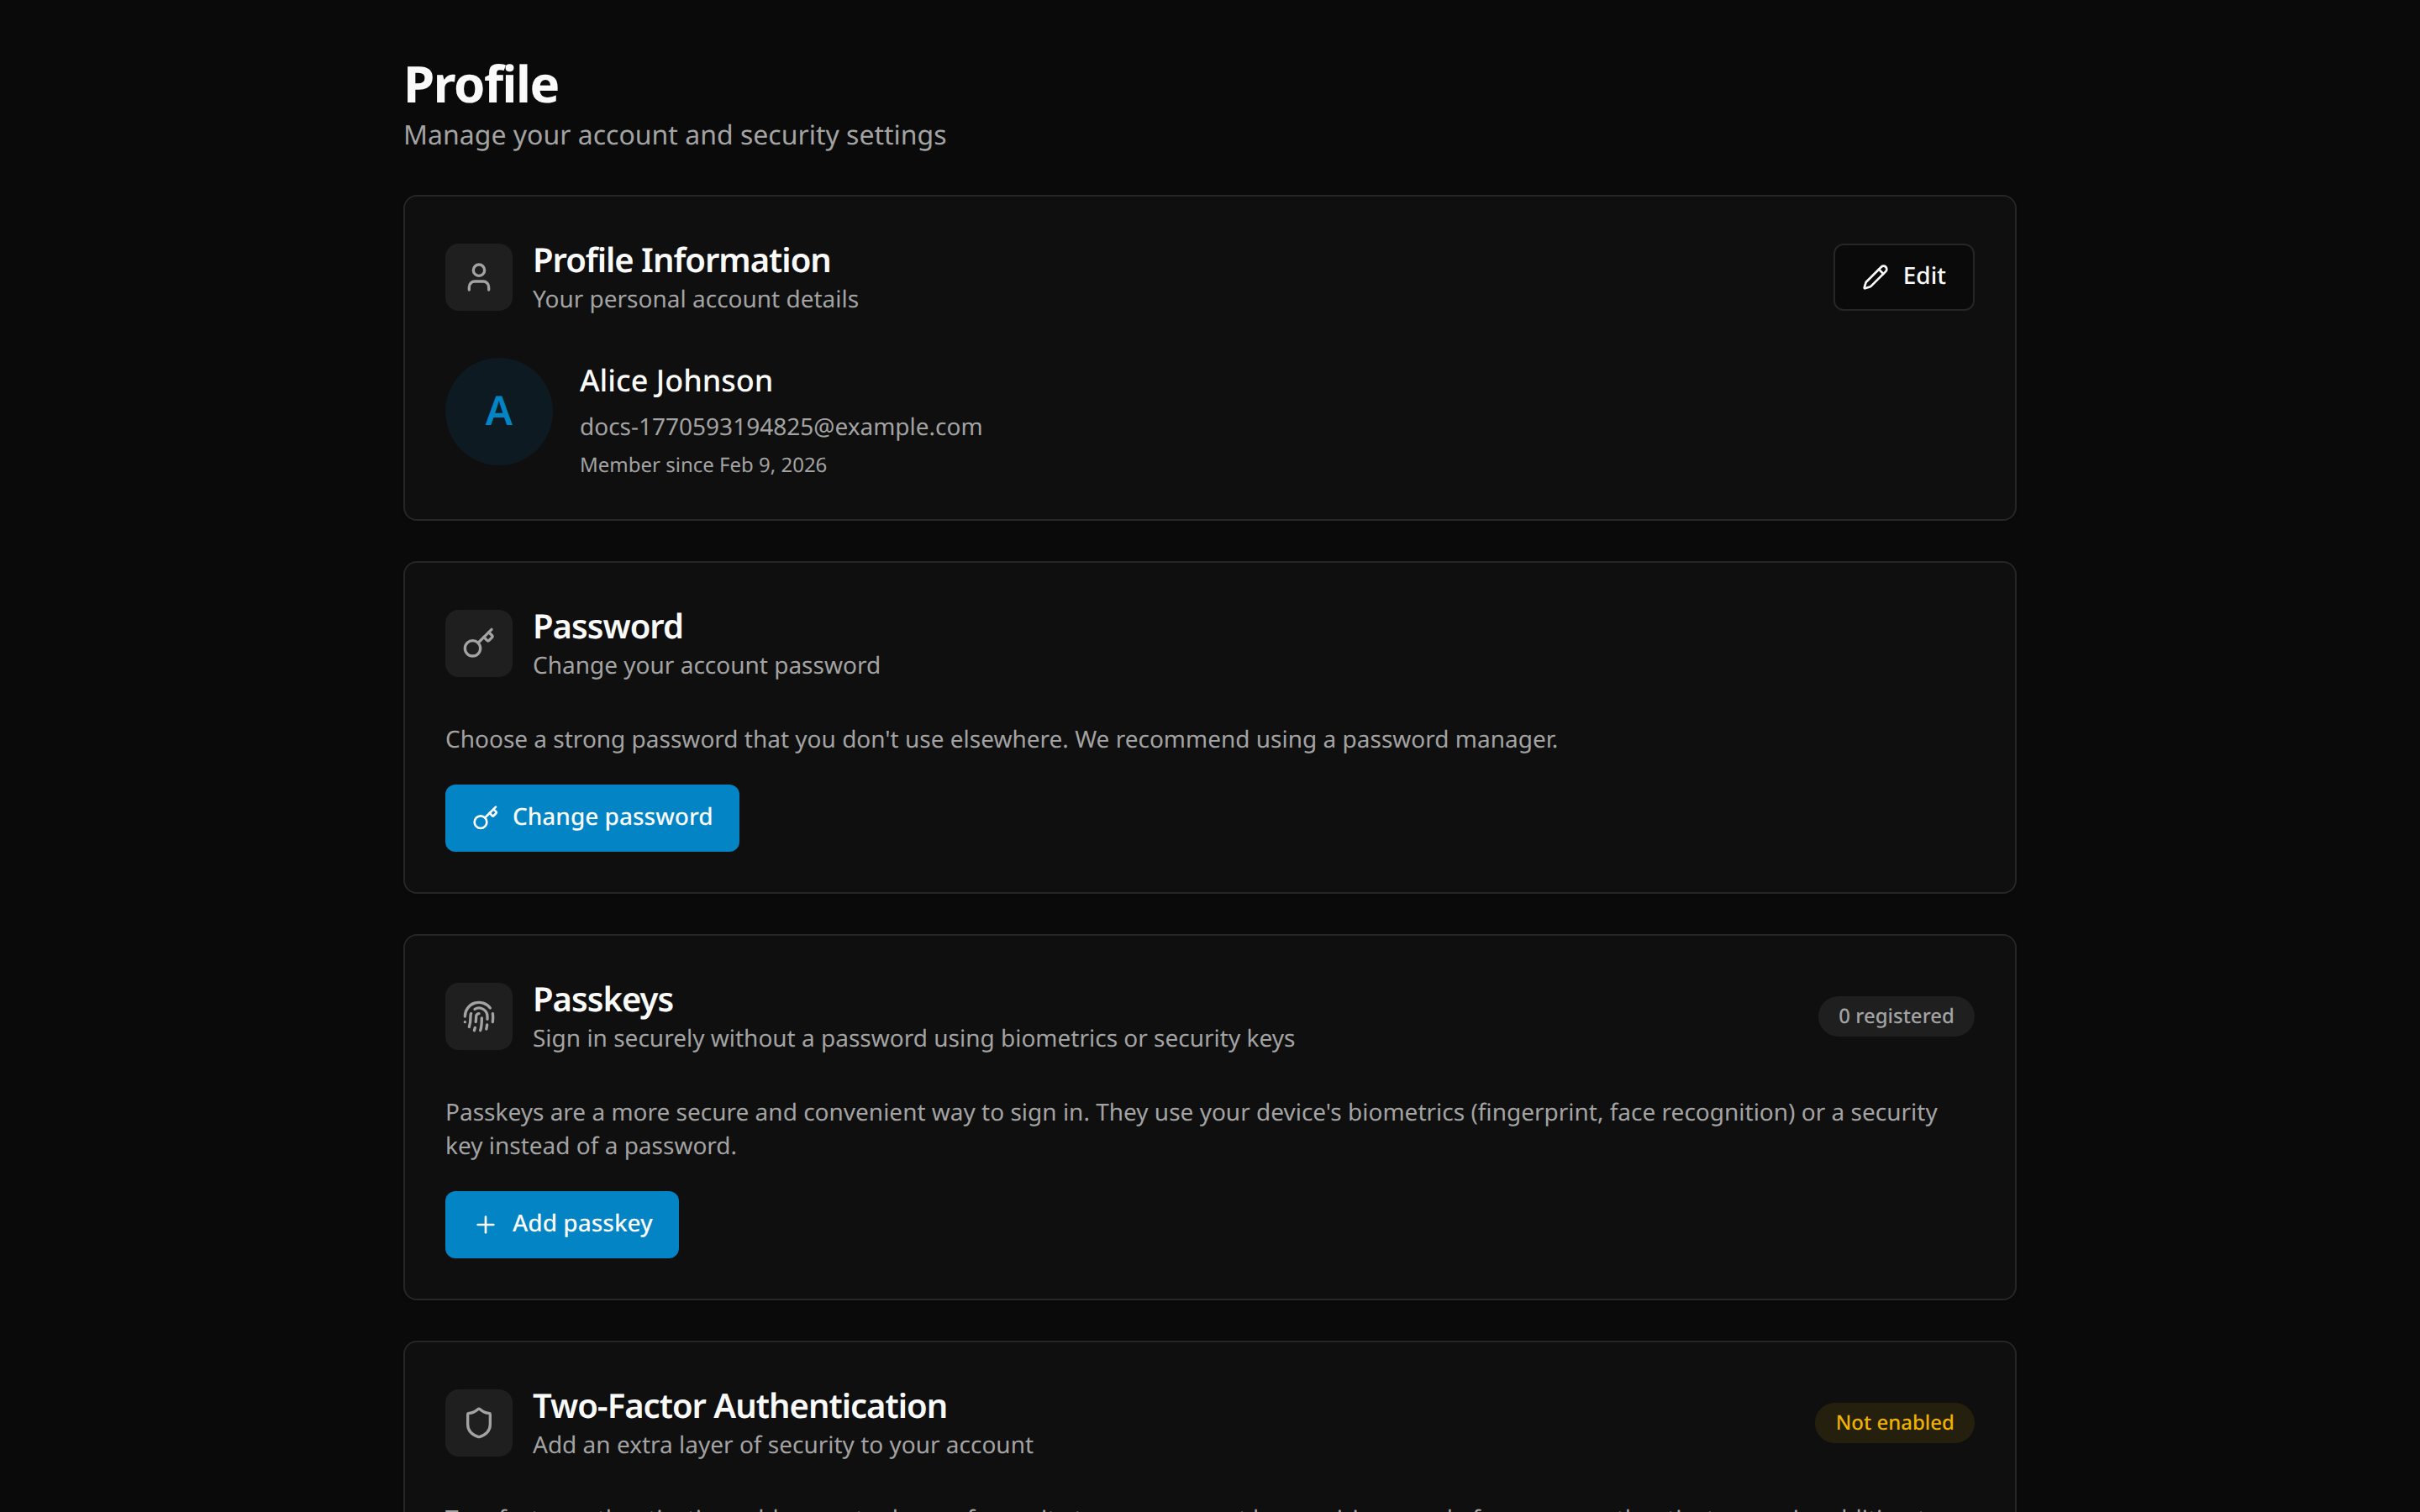
Two-Factor Authentication (2FA)
- Navigate to Profile → Security
- Click Enable 2FA
- Enter your password
- Scan the QR code with your authenticator app
- Enter the verification code
- Save your backup codes securely
Passkeys
Passkeys provide passwordless authentication using biometrics or security keys.
- Navigate to Profile → Security
- Click Add passkey
- Give it a name (e.g., “MacBook Pro Touch ID”)
- Follow your browser’s prompts
- Confirm with biometrics or security key
Session Management
View and manage active sessions:
- Navigate to Profile → Security
- See all active sessions with:
- Device/browser info
- IP address
- Last active time
- Click Revoke to end a session immediately
Audit Log
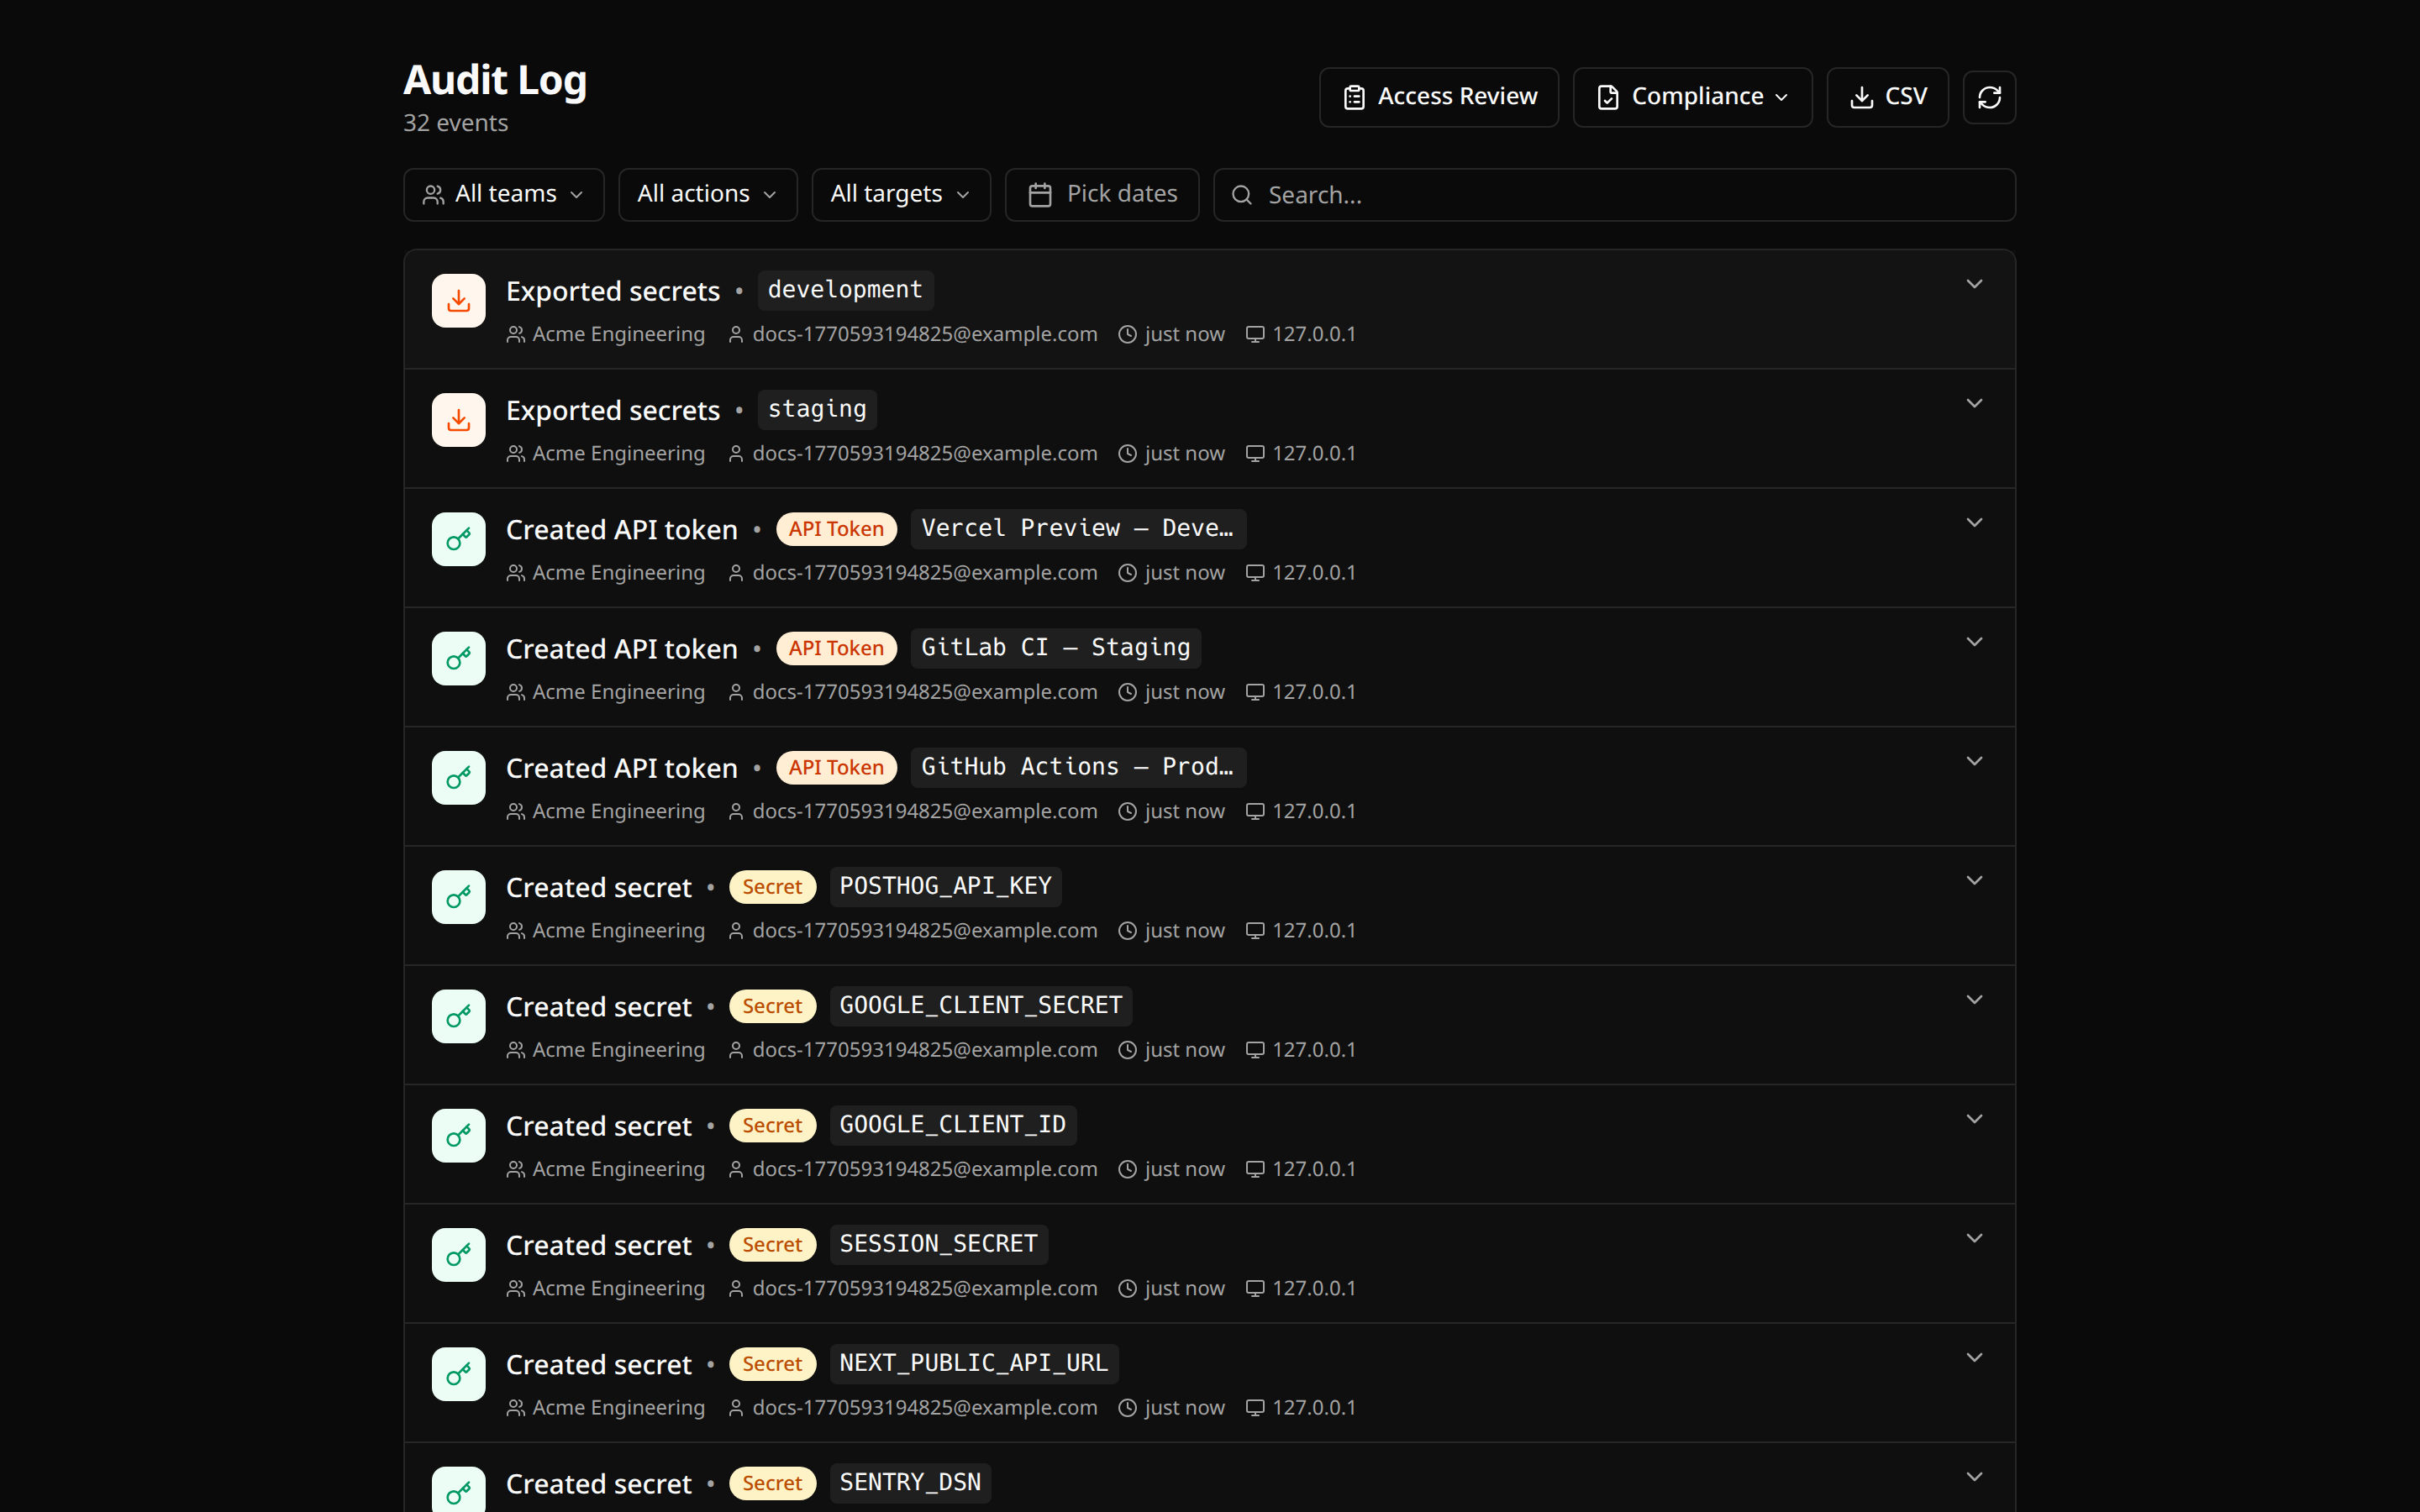
Viewing Activity
- Navigate to Audit Log
- Use filters:
- Search by email, action, or target
- Filter by action type
- Filter by target type
- Set date range
Understanding Events
Each event shows:
- Action (e.g., “Created secret”, “Signed in”)
- Actor (who performed the action)
- Target (what was affected)
- Source (dashboard, CLI, or API token)
- Timestamp
- IP address
Click an event to expand details.
Tracked Actions
| Category | Actions |
|---|---|
| Auth | Login, logout, failed login, 2FA events, passkey events |
| Secrets | Create, update, delete, access, export, rotate, rollback |
| Teams | Create, update, invite, remove member, role change |
| Projects | Create, update, delete |
| Environments | Create, update, delete |
| Tokens | Create, rotate, revoke |
Exporting for Compliance
- Click Export dropdown
- Choose format:
- CSV — General export
- SOC 2 — Security audit trail
- GDPR — Processing activities record
- HIPAA — Access controls audit
Billing & Plans
Plans
| Feature | Developer (Free) | Team |
|---|---|---|
| Team members | 3 free, up to 25 | Unlimited |
| Projects | Unlimited | Unlimited |
| Environments | Unlimited | Unlimited |
| Audit retention | 7 days | 90 days |
| Role-based access | Developer only | 6 roles |
| Price | $0 + $6/extra user | $15/user/month |
Upgrading
- Navigate to Billing
- Click Upgrade to Team
- Start your 14-day free trial
- Add payment method before trial ends
Managing Subscription
- Navigate to Billing
- View current plan and usage
- Manage payment methods
- View invoice history