Getting Started
Install the varsafe CLI, log in, and get from zero to injected secrets in under five minutes.
By the end of this page you will have the CLI installed, a secret stored in varsafe, and that secret injected into a running process — without a plaintext .env file on disk.
Prerequisites
- A varsafe account — sign up free
- Linux or macOS on x64 or arm64. Linux on arm64 is currently not supported; Windows works via WSL.
Installation
The CLI ships as a self-contained binary — it is not published on npm. The installer places it in ~/.varsafe/bin and adds that directory to your shell’s PATH:
curl -fsSL https://varsafe.dev/install.sh | bashOpen a new shell (or source your shell config), then verify:
varsafe --versionYou should see the installed version number (for example 1.3.5). The CLI keeps itself current: run varsafe update anytime to install the latest release.
Log in
varsafe loginThis opens your browser and shows a short confirmation code in the terminal. Approve the request in the browser — the code on screen must match the one in your terminal — and the CLI completes automatically. No password ever passes through the terminal.
If a browser isn’t available (headless machine, container), use email/password with varsafe login --no-browser, or an API token — see CLI authentication for all three methods.
Store and read a secret
Set your working context once, then add a secret:
# Remember your project + environment for subsequent commands
varsafe use -p my-api -e development

# Store a secret
varsafe set DATABASE_URL "postgres://app:app@localhost:5432/app"

# List keys — values stay masked by default
varsafe list

# Read a single value (revealing values is audited)
varsafe get DATABASE_URL
varsafe list should now show DATABASE_URL in your development environment.
Inject and run
This is the core workflow. varsafe run fetches your secrets over TLS and injects them as environment variables into the child process — they are never written to disk and disappear when the process exits:
varsafe run -- npm run devYour app sees DATABASE_URL in its environment; your shell and filesystem never do.
To confirm it works, print the variable from inside a child process:
varsafe run -- sh -c 'echo "DATABASE_URL is ${DATABASE_URL:+set}"'Expected output: DATABASE_URL is set.
Export when a file is required
Some tools insist on a .env file. varsafe export writes one — encrypted by default, so the file is useless without your environment’s keys:
varsafe export -o .envPlaintext requires an explicit opt-in with --plain. See encrypted .env files and the export workflow for formats and options.
The same flow, scripted
The snippet below is the exact script our CI runs against a real varsafe stack on every docs build — if it renders here, it works. It uses the automation-style login: $VARSAFE_TOKEN holds an API token (in CI, from your CI secret store), $VARSAFE_PROJECT names the project, and $VARSAFE_API_URL points at the test stack — in normal usage you omit --api-url and the CLI talks to https://api.varsafe.dev.
# docs-test: local-stack
# Log in with an API token, store a secret, and read it back.
set -euo pipefail

# In CI, pass the token via the environment — never hardcode it.
varsafe login --token "$VARSAFE_TOKEN" --api-url "$VARSAFE_API_URL"

# Set your default project and environment once
varsafe use -p "$VARSAFE_PROJECT" -e development

# Store a secret
varsafe set DATABASE_URL "postgres://app:app@localhost:5432/app"

# List keys (values stay hidden by default)
varsafe list

# Read a single value (pipe-friendly)
varsafe get DATABASE_URL > /dev/null

echo "OK:quickstart"
And the injection flow end to end — note the child process assertion proving the secret arrived:
# docs-test: local-stack
# Inject secrets into a child process as environment variables — no file
# is ever written to disk.
set -euo pipefail

varsafe login --token "$VARSAFE_TOKEN" --api-url "$VARSAFE_API_URL"
varsafe use -p "$VARSAFE_PROJECT" -e development

varsafe set API_KEY "vsafe_example_run_inject_value"

# The child process sees API_KEY; your shell never does.
varsafe run -- sh -c 'test -n "$API_KEY"'

# Only inject secrets matching a pattern
varsafe run --include 'API_*' -- sh -c 'test -n "$API_KEY"'

echo "OK:run-inject"
Project setup
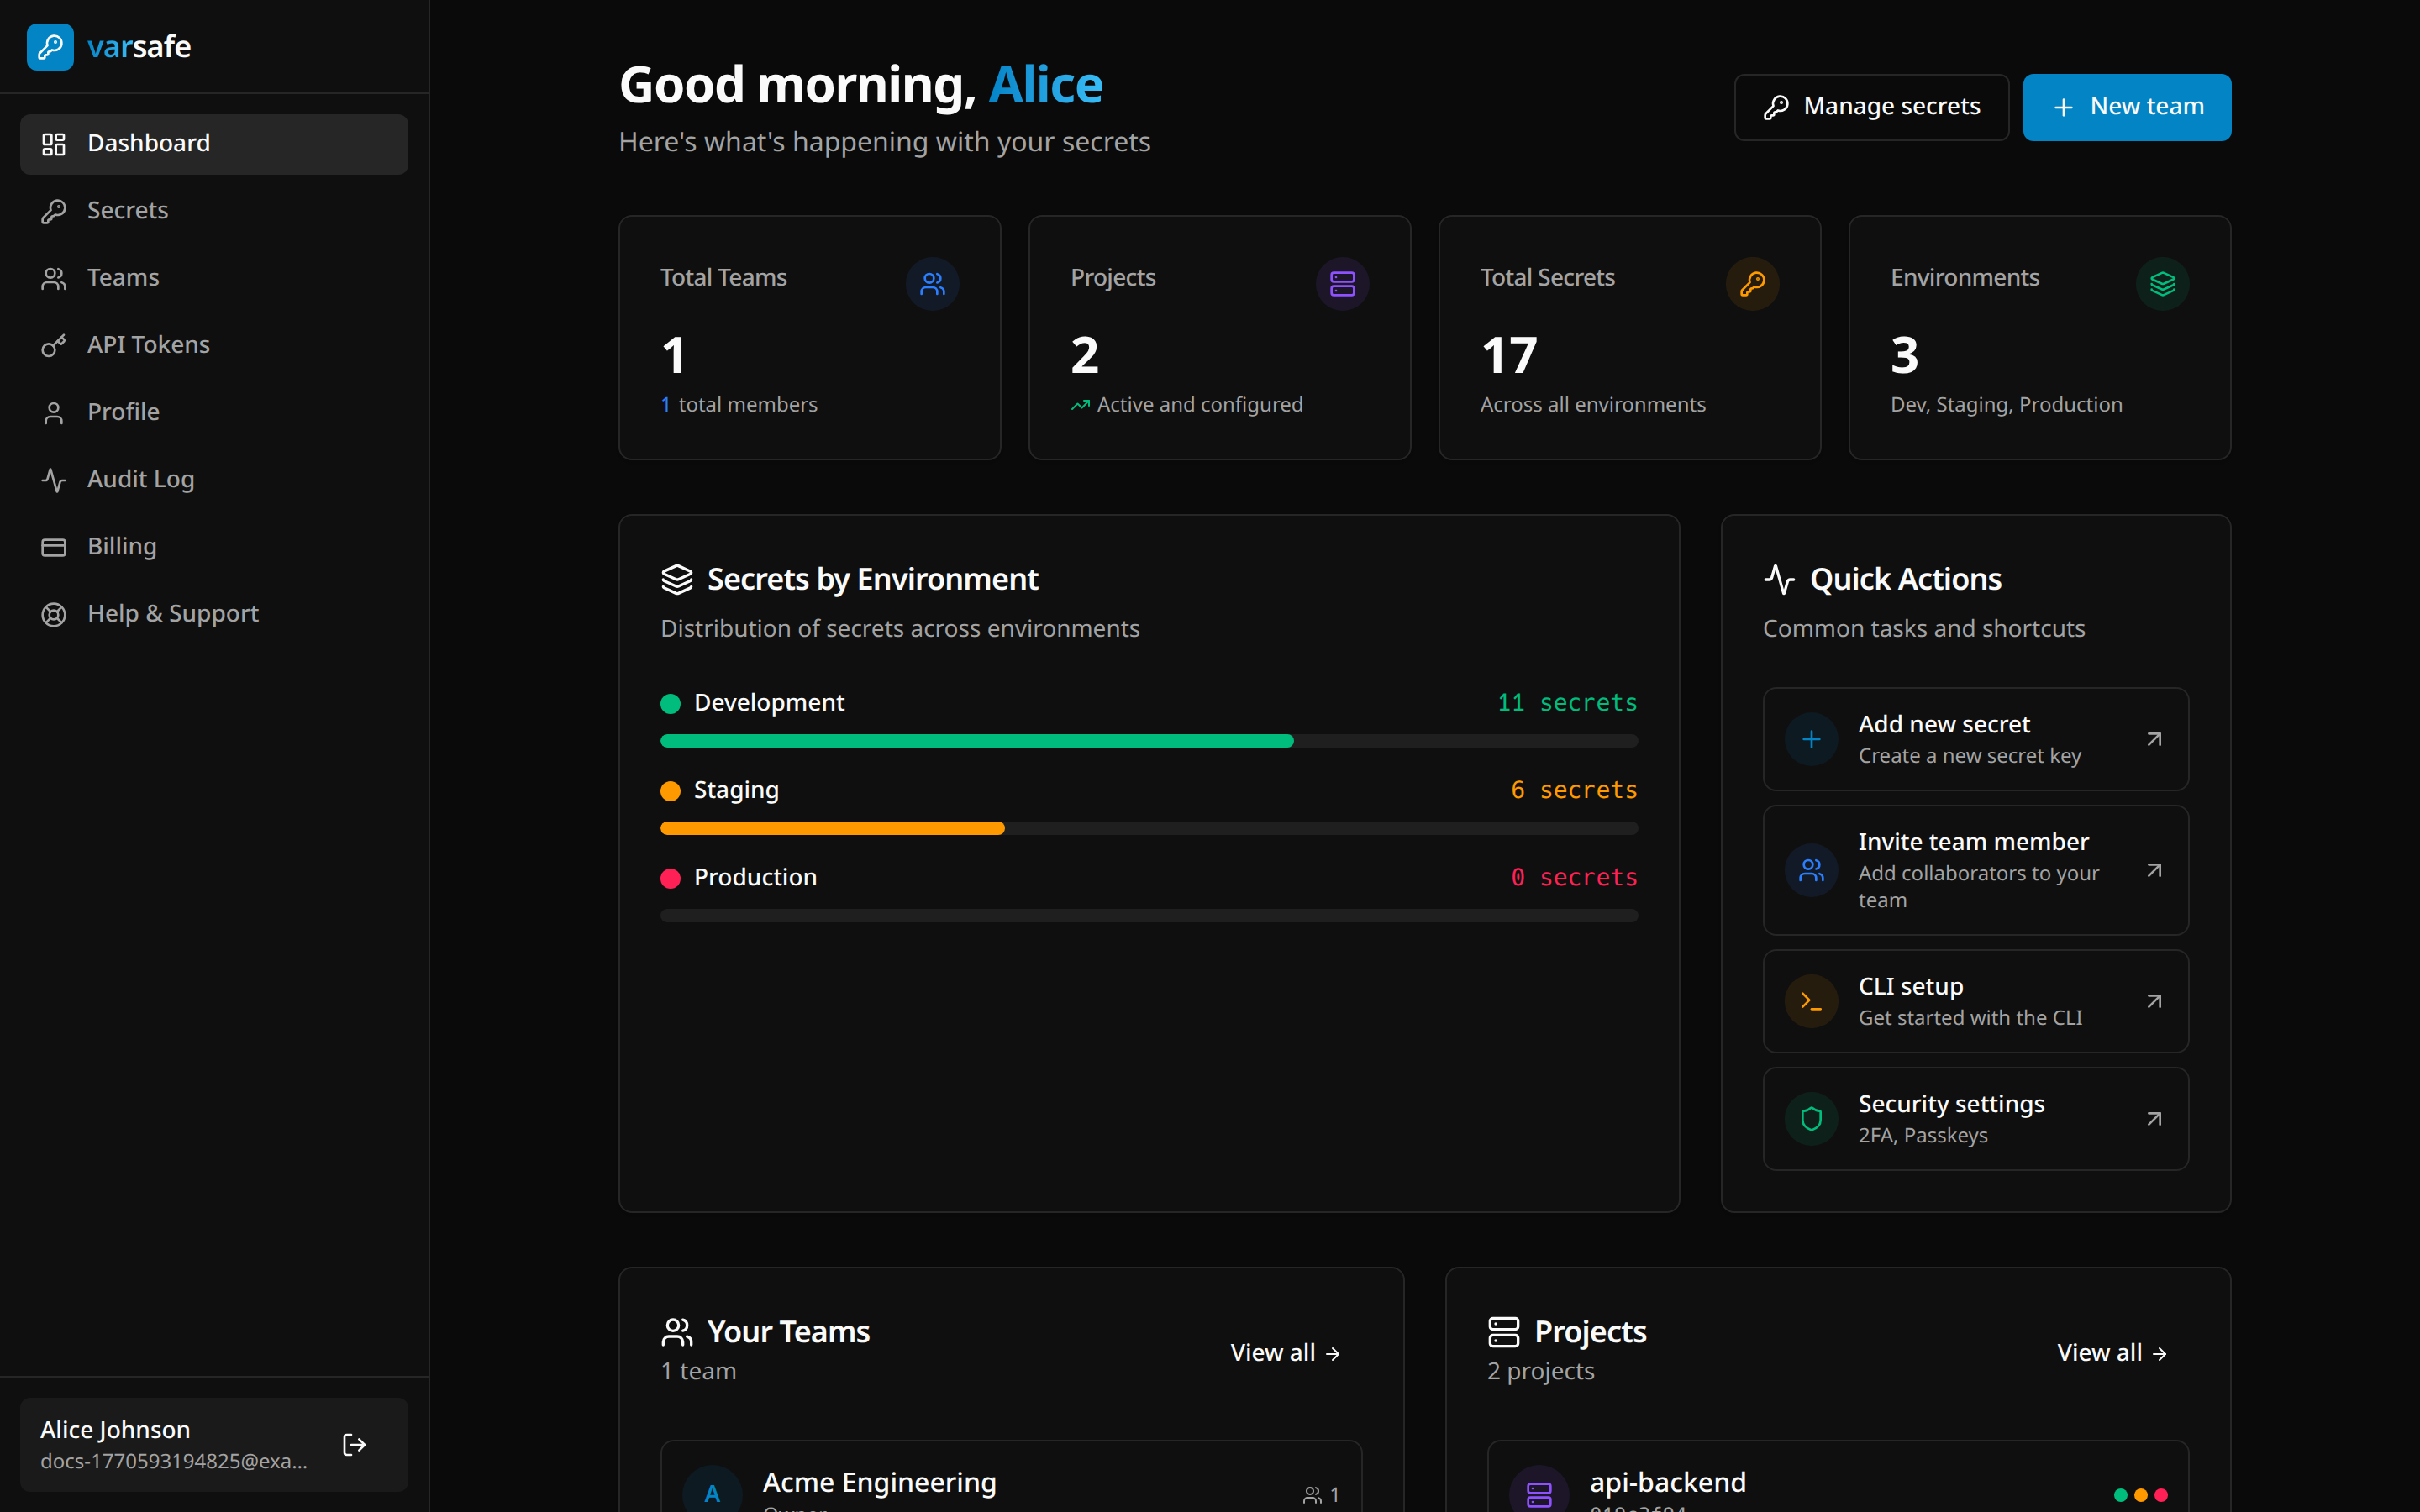
The dashboard gives you a full overview of your secrets across all projects and environments:
Creating a team
- Go to the dashboard
- Click “Create team”
- Name your team (e.g., “Acme Engineering”)
Creating a project
- Navigate to Teams in the dashboard
- Click “Add project”
- Name it to match your repository (e.g., “api-backend”)
Every project comes with three default environments:
| Environment | Purpose | Protected by Default |
|---|---|---|
| Development | Local development | No |
| Staging | Pre-production testing | No |
| Production | Live systems | Yes |
You can create custom environments as needed.
Adding secrets via the dashboard
- Go to Secrets
- Select your project and environment
- Click “Add secrets”
- Enter key-value pairs, or use “Bulk” to paste or drag-drop an existing
.envfile
Team collaboration
Invite teammates from the Teams page (“Invite member”) and assign each a role: owner, admin, developer, operator, viewer, or billing. Roles determine read/write access per environment — production is protected by default, restricting writes to owners and admins. See the roles reference for the full permissions matrix.
CI/CD integration
For automated pipelines, use an API token instead of a personal session:
- Go to your team settings in the dashboard
- Navigate to “API Tokens”
- Create a new token
- Add it to your CI/CD secrets as
VARSAFE_API_TOKEN
# GitHub Actions example
- name: Deploy with secrets
  run: varsafe run -p my-api -e production -- ./deploy.sh
  env:
    VARSAFE_API_TOKEN: ${{ secrets.VARSAFE_API_TOKEN }}
The CLI picks up VARSAFE_API_TOKEN automatically — no varsafe login step needed. See CI/CD usage for GitLab CI and more.
Next steps
- Core concepts — Understand teams, projects, environments, and injection
- CLI reference — Full command reference with examples
- Dashboard guide — Managing secrets, teams, and audit logs
- API tokens — Service accounts for CI/CD pipelines
- MCP server — Connect AI agents like Claude Code and Cursor
- Security model — How your secrets stay safe